Tuesday 6 December 2011

3D Animation complete!

I've now rendered out my 3D animation and put it into Final Cut to edit it together.
This is what it looks like:


Also, here are 3 renders of my scene:


I'm fairly happy with the final result. I would like to have had more interesting camera angles involved but I am not skilled enough at animating the cameras at the moment, I hope to improve on this.
Animating in 3D is more difficult than I thought it would be because I had to think about where every part of the character was at what time, and what to key frame. 
I'm happy with the textures and UV mapping but in the future I would like to investigate this more to create more interesting maps and textures.
I think I was better at creating the environment than animating the character. I think in the future I will focus more on modelling, texturing and rendering and maybe even go into special effects.

Sunday 4 December 2011

Lighting & Rendering Tests

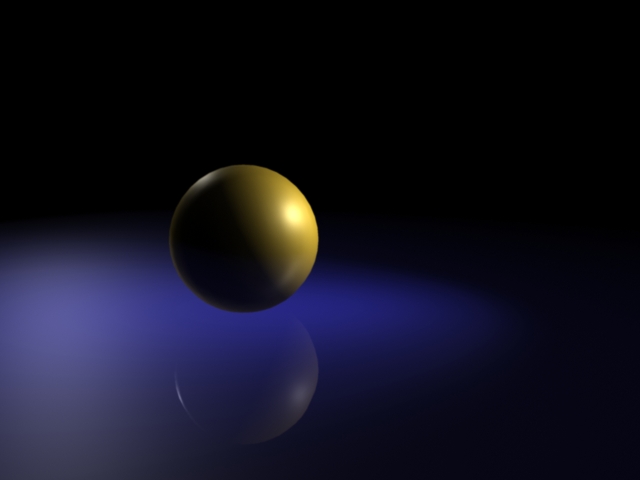
I've begun adding lighting and render effects to my scene now so I decided to carry out a few tests on a yellow blinn sphere to see what each effect looks like so I can decide what effects to add to my objects in my scene.

This is using the default settings for ambience, eccentricity, specular roll off, incandecence and translucence.


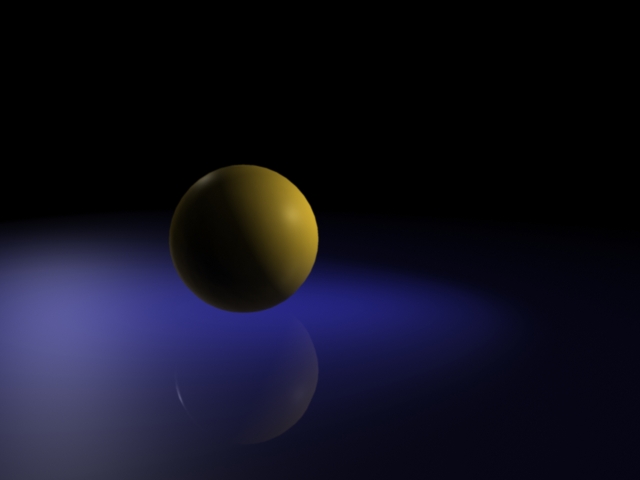
This is using a high value for the ambience. I think it makes the object more clear and stand out a little more but maybe the value is a little bit too high. I may use this is my scene with a lower value.


This is high incandescence. I don't think that this high a value will work for any objects in my scene because I don't have any objects close enough to a light source to need this effect.


This is high translucence. This effect doesn't work very well with this object but it might be useful for some objects in my scene.


This is low eccentricity. I might be able to use this effect in my scene for some objects that are more in the shadows but probably at a slightly higher value than this.


This is high eccentricity. Again, I don't think I will use this effect in my scene because I don't have any objects close enough to a light source for it to look right.


This is low specular roll off. This effect will be useful for objects that don't require much shine. I may use this in my scene.


This is high specular roll off. This will be a useful effect for any objects that require a high amount of shine. I have a few objects that do require this effect so I will most likely use this effect in my scene.


This is high specular roll off but with a different colour light. I don't think I will be able to use it in my scene but I wanted to see what it would look like if I decided to use it.

Friday 2 December 2011

Animation developments

I have now started to inbetween the animation. Maya does this automatically but the timings and movements are not how I want them to look. Sometimes, especially where the character is supposed to stay still, the movements are really slow so I will need to adjust that.
I also had to find a way to keep the sword in my character's hand, as at the moment I've tried to animate it seperately but it doesn't stay anywhere near his hand. I asked for help from Sultan and he helped me to create some constraints that would attach the sword either to the character's belt or his hand, depending on which constraint is switched on. This solved the problem.

I've created 2 more cameras, as well as adjusting the ones I already had, to add variety to the animation. I'd decided to do close-up shots when I created my 2D animation so the 2 new cameras are close-ups.

 This is the close-up I will use towards the beginning, where the character is looking proud and arrogant.
This is the close-up I will use at the end of the animation. The character looks embarrassed, then changes to this expression- looking fed-up

Saturday 26 November 2011

Starting Animation

Using my 2D animation as a timing reference, I’ve now started to animate my character. I’ve done the key poses and now I can start to fill in the rest of the animation.
I’ve also started work on the camera angles. I’ve set 2 of my cameras up and I’ve started to animate the 1st camera.
Here are a couple of renders of my camera angles as they are now:


This camera is animated and pans across the room. This is the angle the camera finishes on.


This is a static camera, but shows the animation from another angle. I will cut to this camera later in the animation.

Wednesday 16 November 2011

2D Animation

I’ve now finished my 2D animation using Adobe Flash. I’ve been doing this alongside building my interior. As well as giving me an idea of what the 3D animation will look like when it’s finished, it should help me to plan out my animation in Maya.
This is my 2D animation:

Sunday 6 November 2011

Texturing Complete!

I’ve added all the textures to my scene now. Doing the swords and shields was a challenge, because I had to get everything in the right place in Photoshop.
When I started adding texture to the fireplace, I noticed that I needed to do some extra modelling to create an inside to the fireplace so I could apply a texture to the inside. I also extended the base of the fireplace to create a hearth. After I’d sorted this out, I added a stone texture to the hearth and a brick texture to the newly created inside of the fireplace.

It’s been a bit difficult at times but I’m happy with the final result.
My fully textured scene:


Friday 4 November 2011

Chairs

Texturing the chairs was quite difficult. This involved more complex UV mapping because the polygons that make up the chair aren’t all simple cubes, so I had to be extra careful in Photoshop to get the textures right in Maya.
This is what I ended up with